Listed here are devices which will help with the placement of an endotracheal tube. Their purpose is primarily to facilitate the actual passing of an endotracheal tube through the glottis rather than to help with laryngoscopy.
One way of classifying these devices is by their working principle:
- Devices which help with intubation using a variation of the Seldinger technique (Gum-elastic bougie, Airway exchange catheters, Aintree catheter, Frova intubating introducer)
- Devices which facilitate ET tube steering towards and through the glottis (Magill forceps, Aillon tube bender, ET tube stylets)
Again, the list of equipment is not exhaustive and there are many more devices available. This is just what we use in our practice.
Gum-elastic bougie
FEATURES
The bougie, also called 'introducer', 'gum-elastic bougie' or 'GEB', is a device which allows a Seldinger-like technique of intubating a patient's airway. This means the device is inserted into the airway first, then an endotracheal tube is railroaded over the bougie into the airway, after which the device is removed.
The device is moderately flexible and can be bent into shape from its straight form, in which it is supplied.
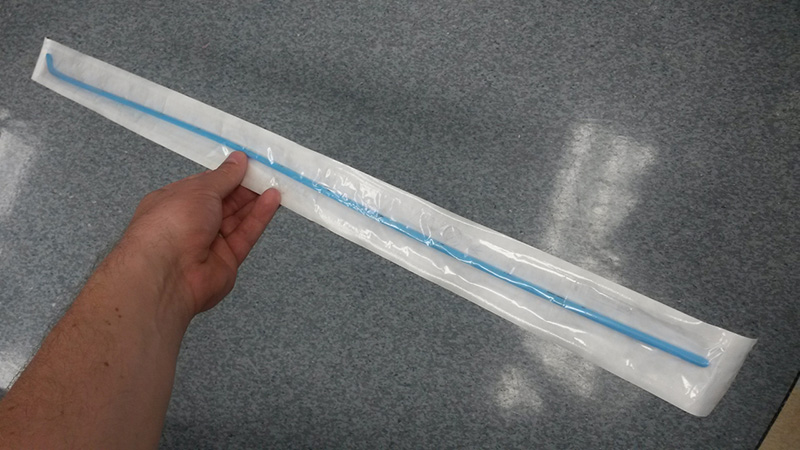
Bougies are commonly about 15F in diameter and 70cm in length, although this might vary slightly depending on the manufacturer. The tip of the bougie is angled at 30 degrees and should point anteriorly during intubation to facilitate navigation of the device towards an anteriorly located larynx.
USES
The device can come in useful during a 'typical' oral intubation, when the view of the larynx is suboptimal, and particularly if this is due to an anterior larynx. Bougies are also commonly used during endotracheal tube or tracheostomy exchange, much like an airway exchange catheter. Bougies, in contrast to airway exchange catheters, do not have a central lumen and can therefore not be used to oxygenate the patient.
The technique of how to intubate with a bougie is described here.
Aintree catheter
FEATURES
The Aintree intubation catheter is a blunt-tipped, 19 Fr radio-opaque catheter with an internal diameter of 4.7 mm and an outer diameter of 6.5 mm. It has centimeter markings from 5 to 35 cm on the outside to help with placement.

The Aintree catheter was invented by Professor Peter Charters, an anesthesiologist from the University Hospital Aintree in Liverpool, UK.
The catheter is supplied with two Rapi-Fit® connectors, one with a standard 15 mm tube connector and the other one with a Luer-lock connector. The kit also includes a soft-seal swivel adaptor to allow ongoing ventilation whilst placing the catheter.
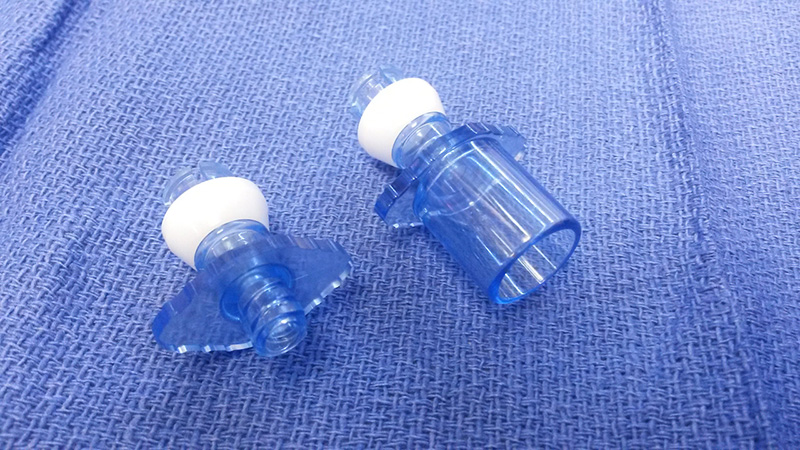
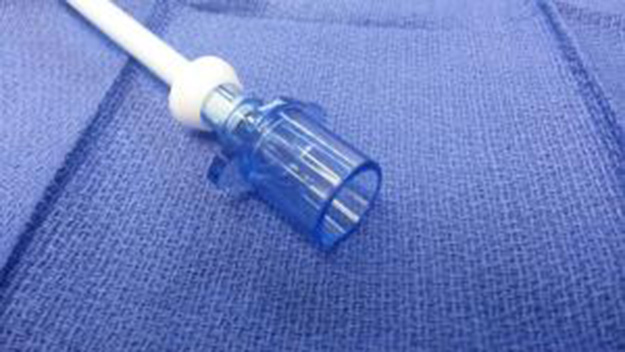
The catheter is just short enough to fit completely over an standard adult flexible fiberoptic bronchoscope, leaving enough space at the end of the scope for flexing the bending section to navigate. Note the diameter of you bronchoscope!
The manufacturer's recommendations state that an endotracheal tube need to be of an internal diameter of 7.0 mm or greater to accommodate the Aintree intubation catheter. In practice, a 6.5 ET tube is the smallest suitable size, but with a somewhat tight fit. If you use a 6.5mm ET tube the fiberoptic scope should be lubricated generously with a silicone-based spray. A 6.0 ET tube is definitely too small (see below).
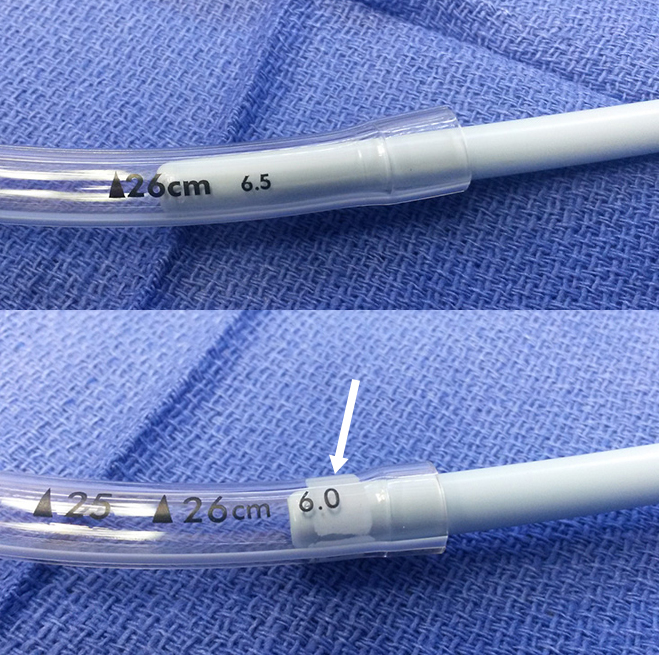
It is probably best to use a 6.5 or 7 mm ET tube with the Aintree catheter and avoid larger ET tube sizes as a large 'step-up' between the Aintree catheter and the ET tube can lead to the tube getting caught at the vocal chords, making the passing of the ET tube difficult with the risk of trauma (see picture below). If a large ET tube, i.e. size 8.0 or greater, is required, it might be advisable to use a Parker Flex-Tip tube®.
Approximately 2 cm from the distal opening the Aintree intubation catheter has a small side hole on each side to ensure adequate airflow and (maybe) reduce the risk of trauma when jet ventilation is used.
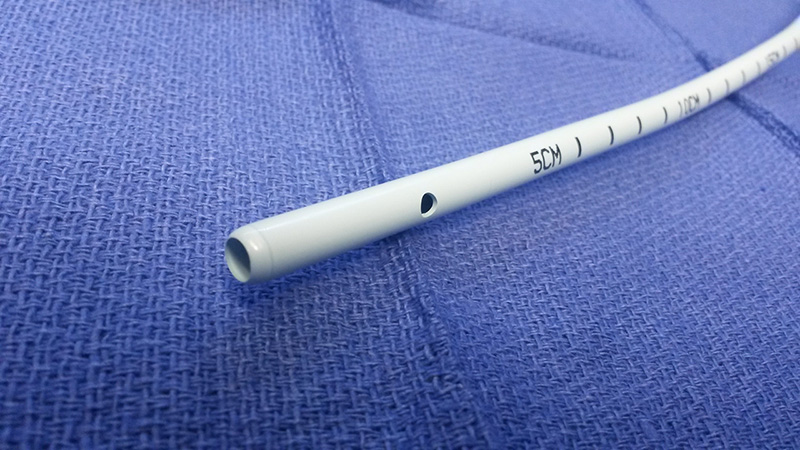
USES
The Aintree intubation catheter is primarily used for intubating through a laryngeal mask with fiberoptic guidance.
Another indication for its use is the exchange of an endotracheal tube, although other (longer) devices are preferable when fiberooptic guidance is not needed, such as an airway exchange catheter or the gum-elastic bougie (see below and above, respectively).
CAUTION: Jet ventilation through any catheter such as an Aintree, a Frova, or an exchange catheter should be a last resort. Major morbidity and even deaths have been reported from accidental high-pressure gas injection outside the tracheal lumen!
Airway exchange catheters
Enter content.
Frova intubating catheter
FEATURES
The Frova intubating introducer was invented by the Italian anesthesiologist Dr. Giulio Frova, who practiced in Brescia until his retirement, and introduced into practice in 1996.
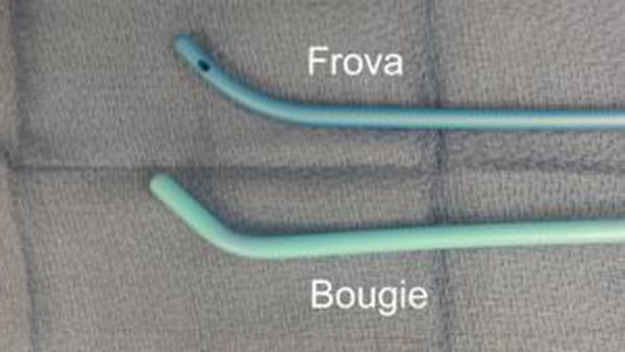
The catheter is available in two sizes, 8 and 14 Fr. It has length markings in centimeters on the side which start at 10 cm from the tip. The catheter contains a central lumen for oxygenation, which opens through two side holes at the blunt and closed tip. The tip of the catheter is bent in a way similar to the one of a gum-elastic bougie (see picture below), designed to facilitate passage through the glottis.
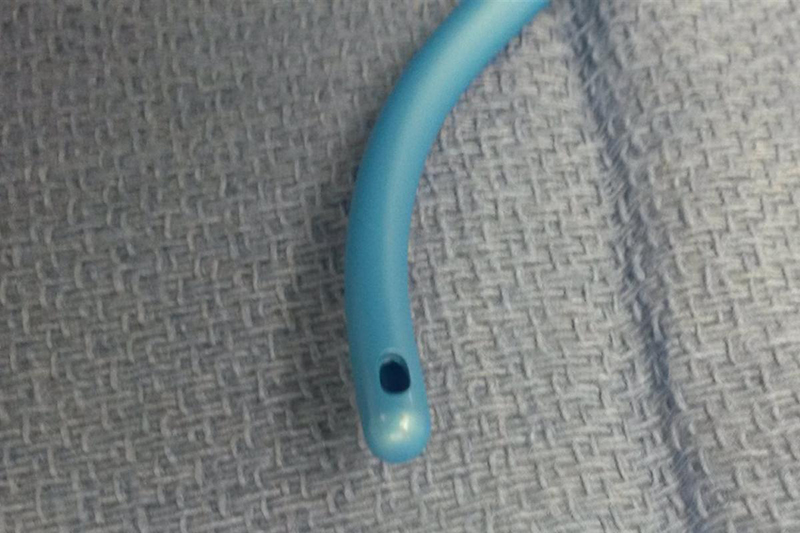
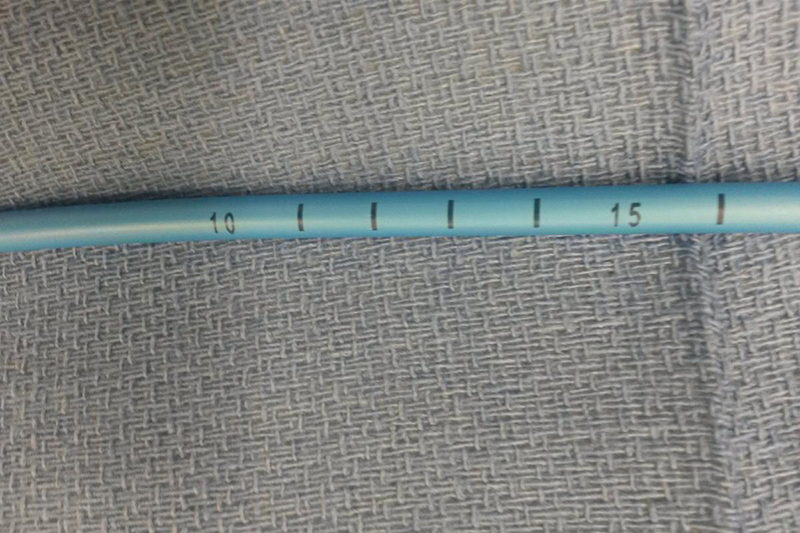
The Frova catheter is supplied with a stiffening cannula. Note that the 14 Fr catheter can also be purchased without the stiffening cannula while the 8 Fr cannot. The stiffening cannula is straight, very rigid, and cannot be bent or adjusted in any way.
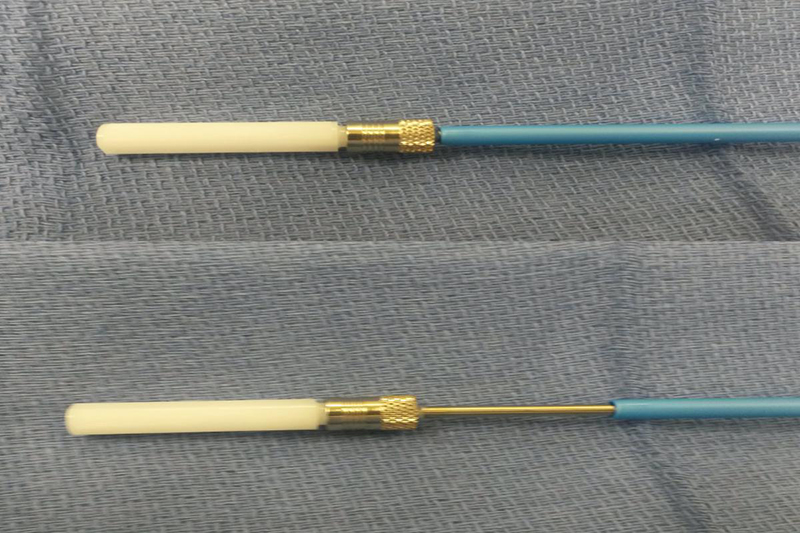
CAUTION: 'Stiffening cannula' is perhaps something of a euphenism. It has a considerable diameter, is not malleable, and is nothing like an ET tube stylet! It has weapon potential!
The Frova intubating introducer is also supplied with two Rapi-Fit® adapters, trademarked by Cook Medical, which allow attachment of a Luer-lock or standard 15 mm breathing system connector. With the Rapi-Fit® adapters, oxygenation is possible through the Frova catheter once it has been placed into the trachea and the stiffening cannula has been removed.
The Frova catheter is somewhat similar to the (gum-elastic) bougie, the main differences being the central lumen allowing for oxygenation and the stiffening cannula.
USES
The indications for using the Frova catheter are pretty much the same as for the gum-elastic bougie, that is 'standard' orotracheal intubation with a conventional laryngoscope when visualization of the larynx in suboptimal, as in grade 2 or 3 Cormack-Lehane views. The Frova catheter has the added benefit of allowing oxygenation through a central lumen.
CAUTION: You should at least be able to see the epiglottis during laryngoscopy in order to use the Frova!
For oxygen delivery through the Frova catheter, remove the stiffening cannula after endotracheal positioning, and attach either the Luer-lock or the 15 mm Rapi-Fit connector. The Luer-lock connector can then be hooked up to a manual jet ventilator, whereas the 15 mm connector allows attachment of an anesthetic breathing system.
CAUTION: Jet ventilation through any catheter such as an Aintree, a Frova, or an exchange catheter should be a last resort. Major morbidity and even deaths have been reported from accidental high-pressure gas injection outside the tracheal lumen!
The stylet of the Frova catheter is very rigid, and although it does not extend all the way to the tube tip, you can cause serious damage to the airway with this device if you do not use it correctly. Most importantly, withdraw the stylet as soon as the tip of the Frova catheter passes through the vocal chords. The styletted portion should never pass through the vocal chords and has to be visible during laryngoscopy at all times! Alternatively, use the Frova without the stiffening cannula (like a bougie).
PERSONAL OPINION: The indications for using the Frova catheter seem very limited. My first choice would be a gum-elastic bougie in the situations mentioned above, followed by videolaryngoscopy if the bougie approach is unsuccessful.
Magill forceps
FEATURES
The Magill forceps is named after Sir Ivan Magill who invented the device in the 1920s to help with ET tube placement during nasal intubation. The design remains pretty much unchanged. It is a right-handed instrument which is angled in two planes.
The characteristic features are the serrated grasping surfaces at the tip which are rounded to reduce the risk of tissue trauma.


USES
The Magill forceps several indications:
- It is very useful and often downright necessary in nasotracheal intubations where it is used to maneuver the tip of the ET tube. The Magill forceps is used to pick up the ET tube in the posterior oropharynx and place its tip into the laryngeal inlet. The forceps' grasping surfaces are serrated and care must be taken not to rupture the cuff when maneuvering the ET tube or accidentally grasp tissue and cause trauma.
- The Magill forceps can also be useful in clearing foreign bodies from the upper airway in anesthetized or unconscious patients.
- Another use of the device is in placing and removing throat packs.
There are generally two things that can go wrong with using a Magill forceps. Thankfully both can be avoided with careful use:
- ET tube cuff damage/ rupture: The serrated grasping surface of the Magill forceps can rupture the cuff on the ET tube. To reduce the risk of that happening the tube should be held with the forceps just proximal to the cuff (see picture below).
- Tissue trauma: Iatrogenic injury from the Magill forceps, when it occurs, usually happens to the uvula or posterior oropharyngeal wall.

CAUTION: Never use the Magill forceps to manipulate tissue! It will bleed.
How to use the Magill forceps is described on the page on nasal intubation.
Aillon tube bender
FEATURES
USES
Stylets
FEATURES
Stylets are malleable metal rods which are covered with a clear plastic sheath with a more or less atraumatic tip. They come in adult as well as pediatric lengths and diameters.


Stylets are available from several manufacturers and lengths as well as diameters may vary somewhat. In adult practice when using small diameter ET tubes, particularly microlaryngoscopy tubes (MLT) it is important to appreciate the diameter of the stylet.
The adult version of the stylet with the Mallinckrodt trademark is a 14 Fr size, meaning it has an outer diameter of 4.66 mm (read up on the conversion here). It fits well into a 5.5 standard ET tube but in a 5.0 one it is a very tight fit.
USES
Stylets are used inside an endotracheal tube to give it a certain bent shape which aids navigation of the tube towards the laryngeal inlet.
How to 'stylet' a tube:
- Insert the straight stylet into the ET tube all the way.
- Pull back the stylet until its tip is about level with the Murphy eye.


- Bend the looped end of the stylet 90 degrees where it exits the 15mm connector of the ET tube to prevent it from acidentally slipping back into the ET tube.

- Now bend the ET tube/ stylet arrangement into the desired shape for intubation. Most practitioners re-create the Magill curve or make a hockey stick-like shape.
When to stylet a tube
Many practitioners feel that the routine use of a stylet with a standard endotracheal tube and conventional laryngoscopy is unneccessary and increases the risk of accidental trauma to the airway without clear benefits in a majority of patients. The standard endotracheal tube's 'natural' curvature (Magill curve) is usually adequate in most cases of laryngoscopy to place the tube through the vocal chords without loading it onto a stylet.
PERSONAL OPINION: When I trained in the UK I never saw stylets used routinely whereas in my current institution in the US styletting the ETT is standard practice. If the view of the larynx in C/L grade 1, a stylet is not generally needed.
In contrast to the 'standard' ETT, the armored/ reinforced tube usually requires a stylet as it is more 'floppy' does not maintain its Magill curve well during intubation.
Although stylets are malleable they should be considered rigid intubating aids and therefore never be advanced into the patient's larynx or trachea, i.e. beyond the vocal cords, due to the risk of causing significant trauma.
